Overview
INSTALL DESKTOP SYNC
Download and install the odrive desktop application to directly access and sync on your computer.
Visit the Downloads page for desktop clients (Windows, Mac) and the command line sync agent (Linux, Windows, Mac).
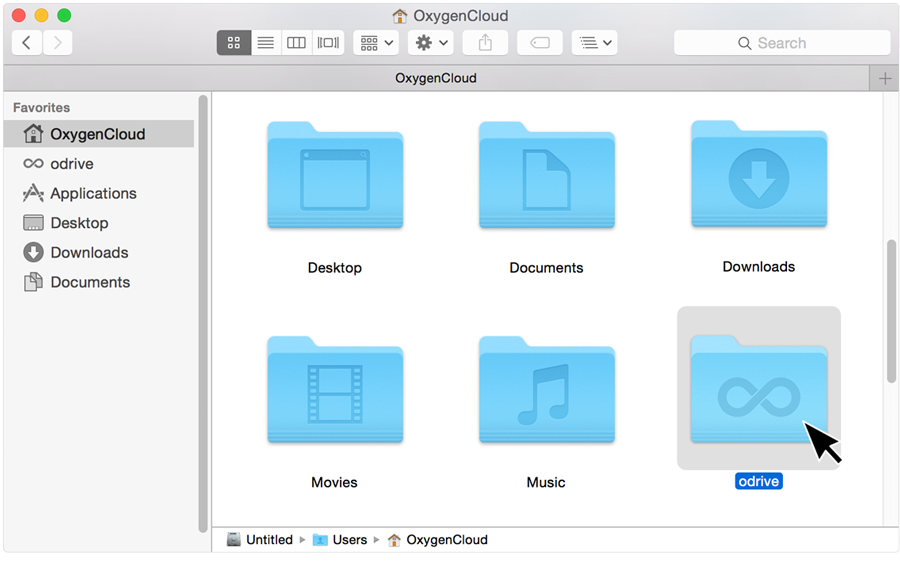
The application will create an odrive folder that stays automatically synchronized with your odrive account.
USING WINDOWS SYNC
Click here for a quick video on the basics of using odrive on Windows
You can browse and open odrive files like you do normal files and folders through Windows Explorer. When you want to manage your account, you open the odrive tray menu. When you want to kick off an action on a file or folder, you right-click on the file or folder.
You can right click on any file or folder to see your odrive options.
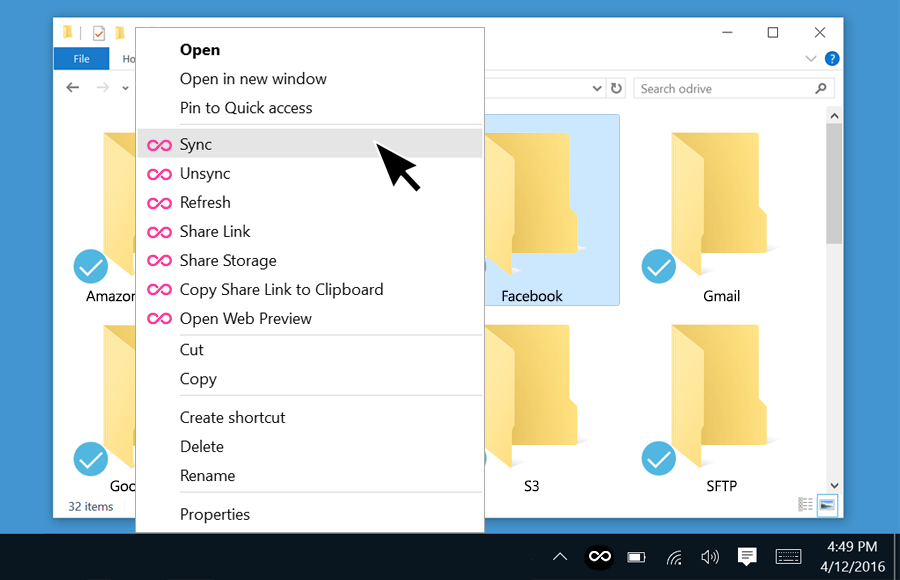
The right-click menu dynamically changes depending on whether it’s a file or folder; and whether it’s a placeholder or the actual file/folder.
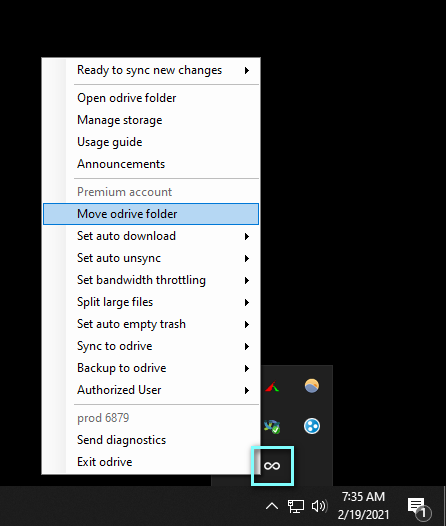
The odrive menu is located in your system tray.

The tray menu will also enable you to manage global settings and sync control, as well as open odrive on the Desktop or on the Web.
USING MACOS SYNC
Does odrive work on newer Macs with the Apple M1 chip?
Yes, you can use odrive on both M1 and Intel-based Macs. The same installer can be downloaded and used for Macs on either architecture.
Click here for a quick video on the basics of using odrive on MacOS
You can browse and open odrive files like you do normal files and folders through Finder. When you want to manage your account, you open the odrive tray menu. When you want to kick off an action on a file or folder, you right-click on the file or folder.
You can right click on any file or folder to see your odrive options.
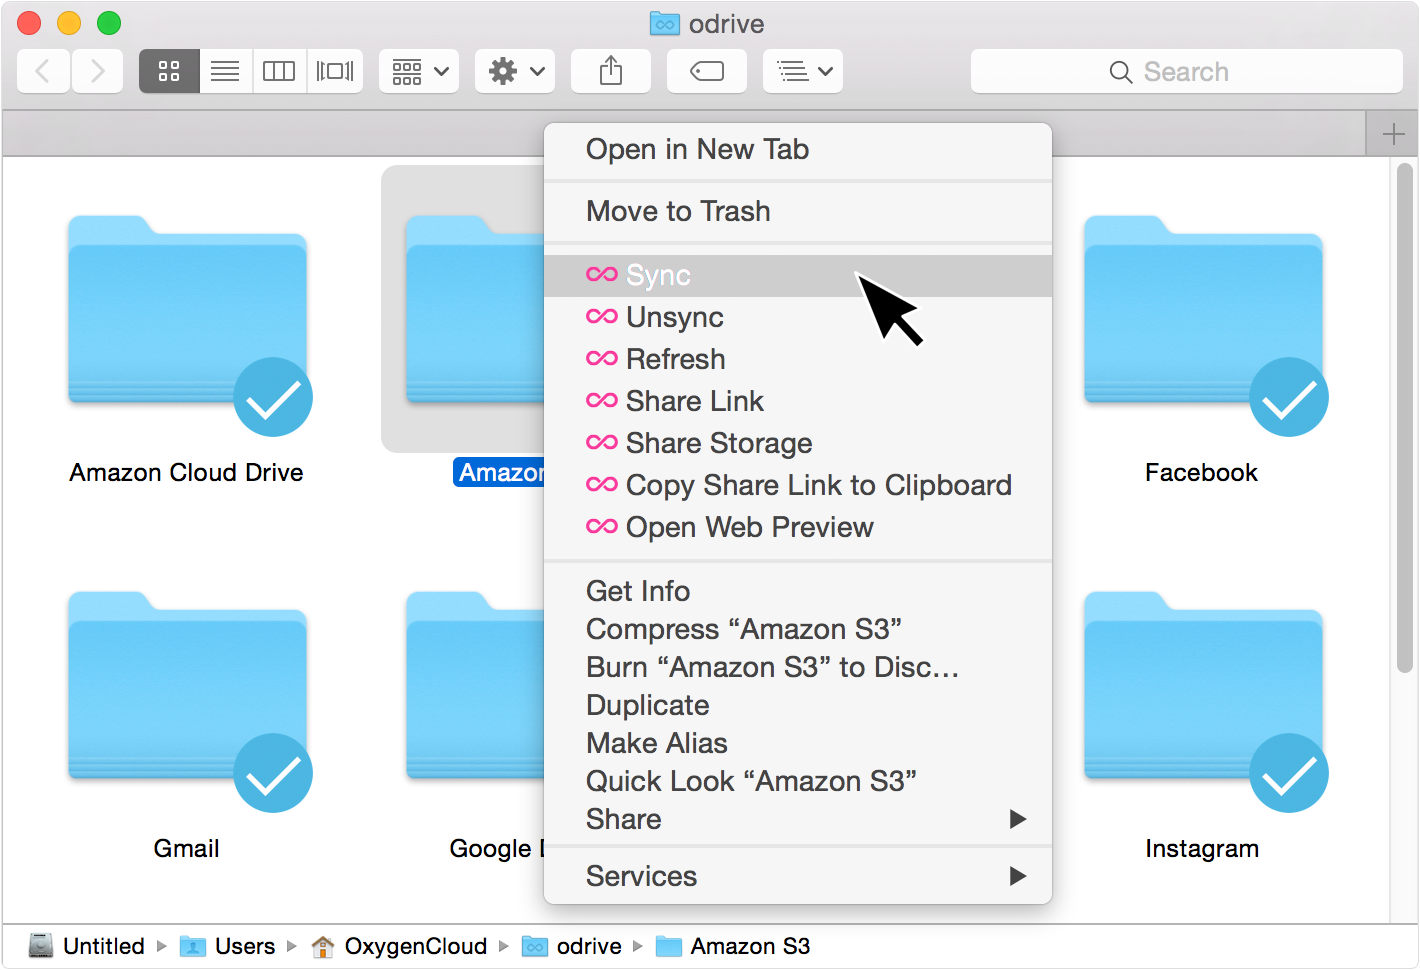
The right-click menu dynamically changes depending on whether it’s a file or folder; and whether it’s a placeholder or the actual file/folder.
The odrive menu is located in your system tray.
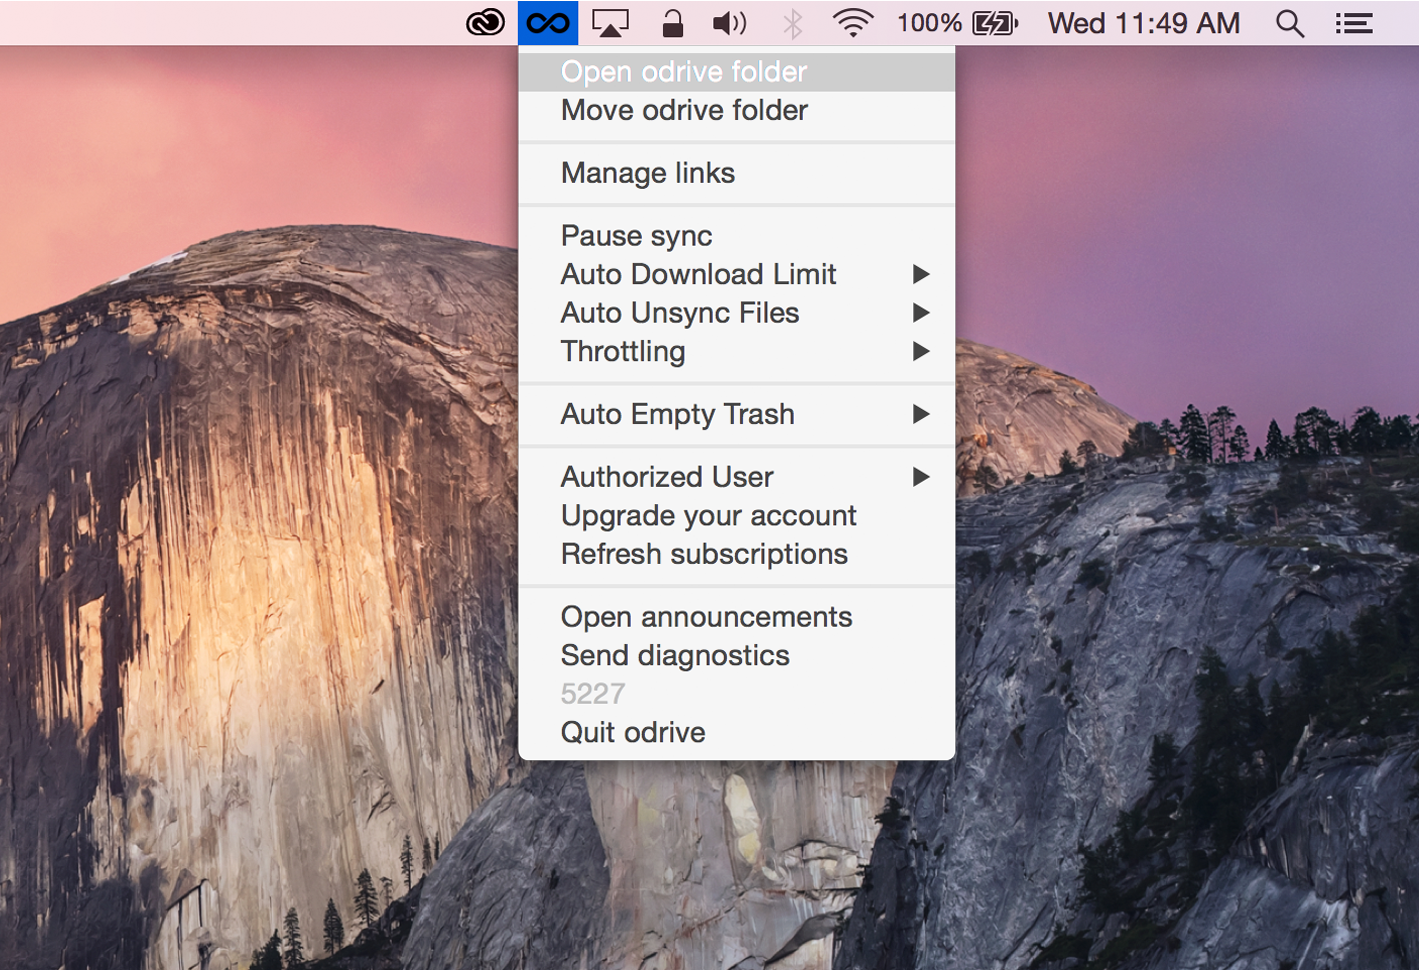
The tray menu will also enable you to manage global settings and sync control, as well as open odrive on the Desktop or on the Web.
LINK YOUR STORAGE
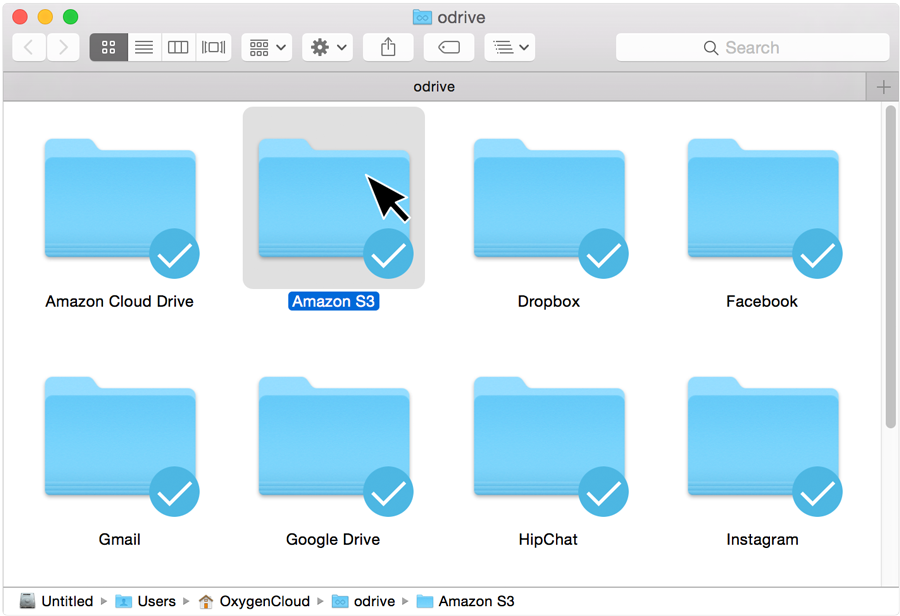
After you link all your clouds, apps and storage to odrive, they will appear as individual folders in your file system. You will not have to enter account credentials again to access that storage with odrive.
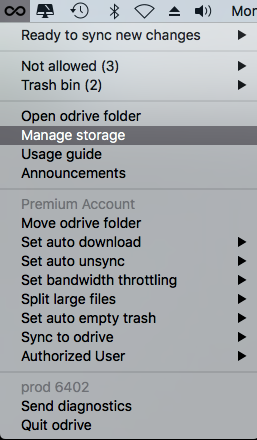
From your system tray menu, click on "Manage Storage".
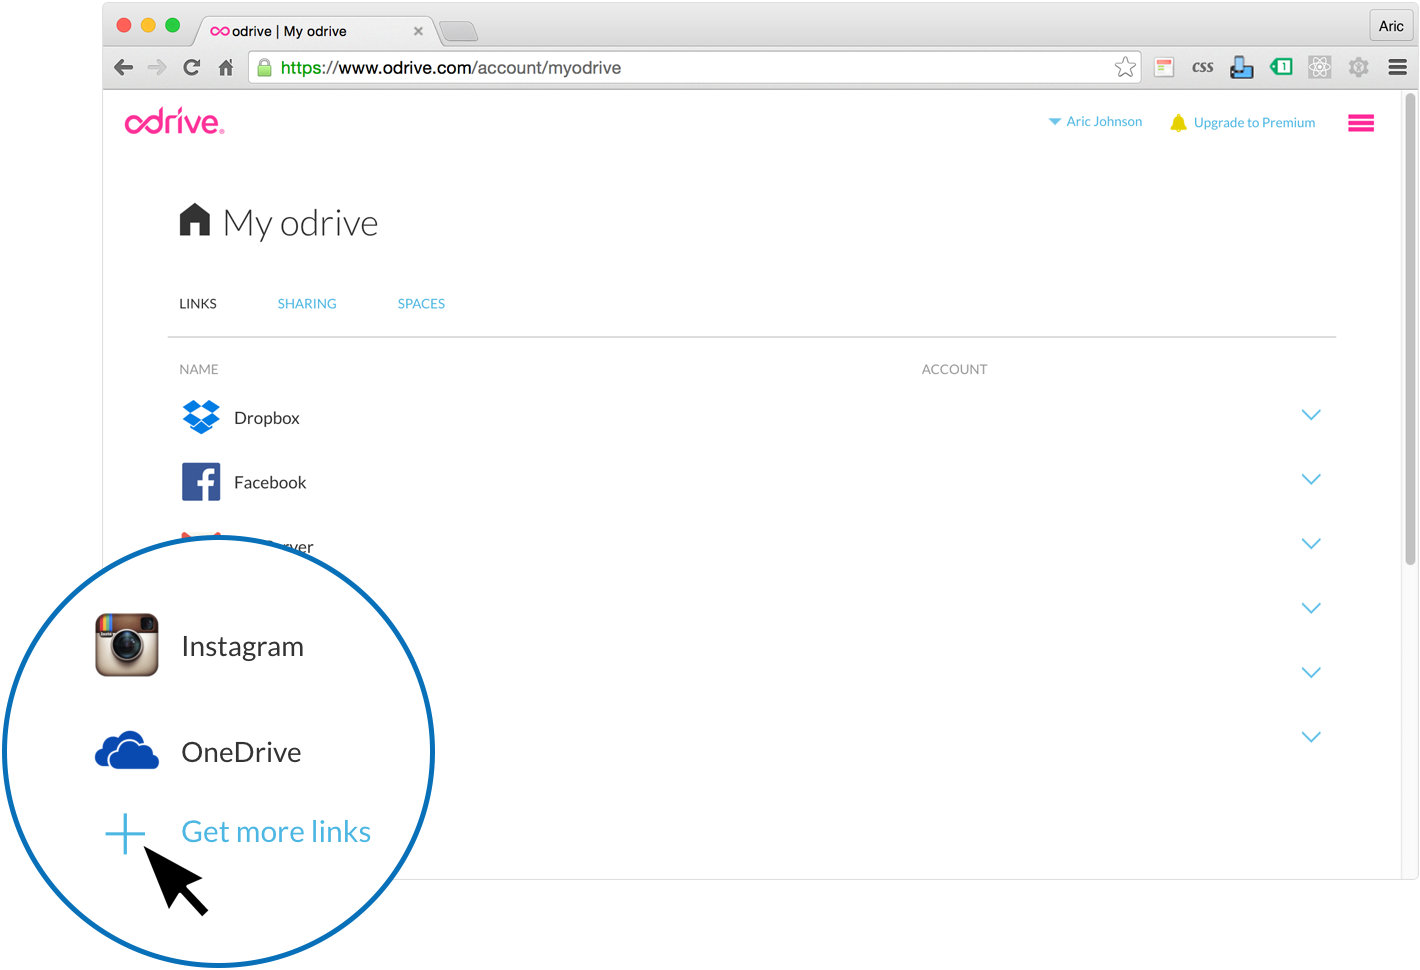
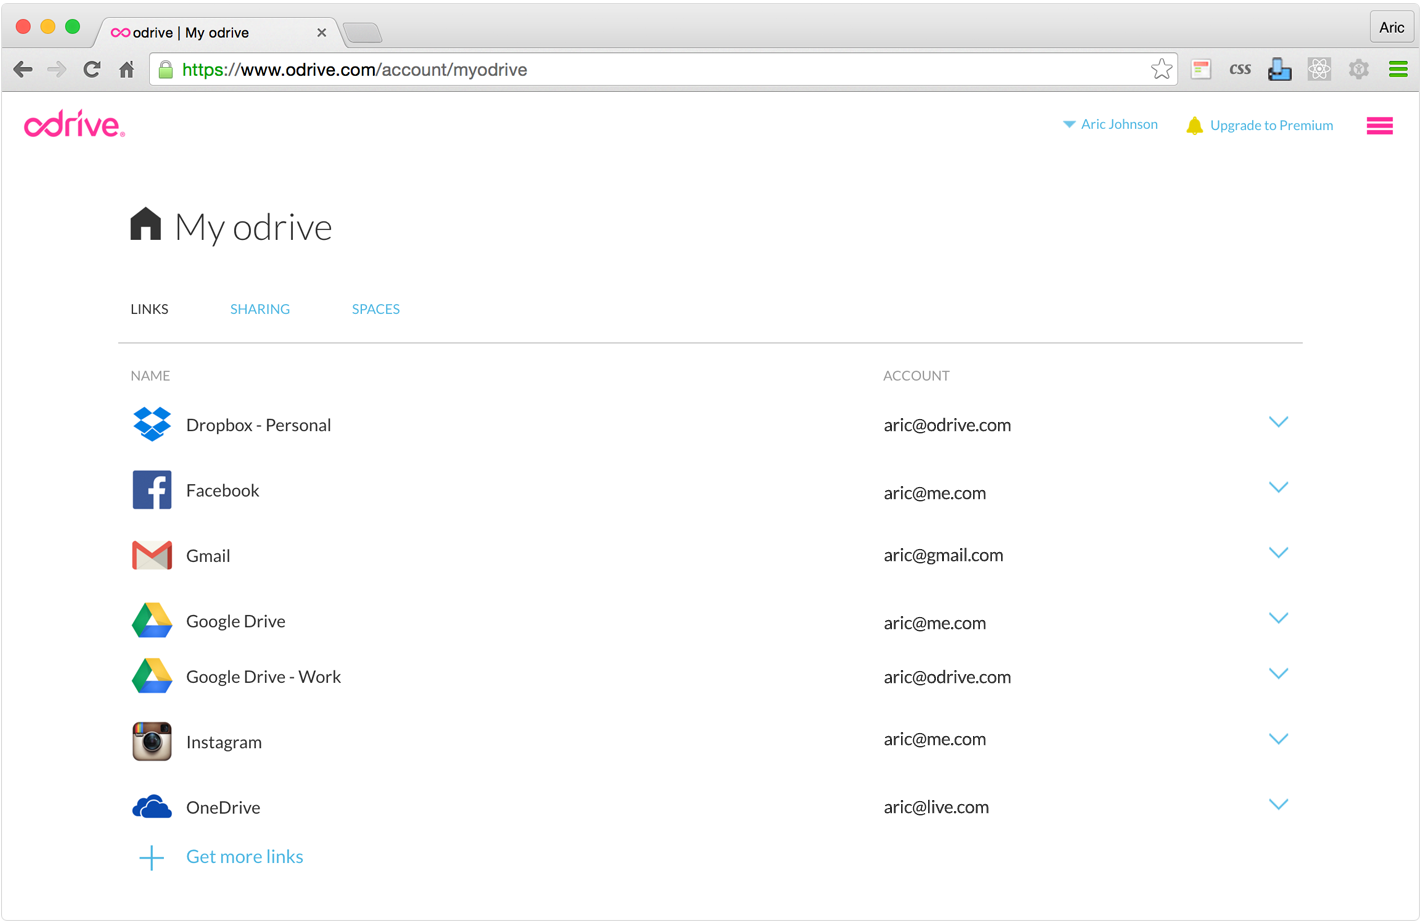
It will take you to your "My odrive" webpage, where you see the storage and links you have previously authenticated. To link more, click on the "+":
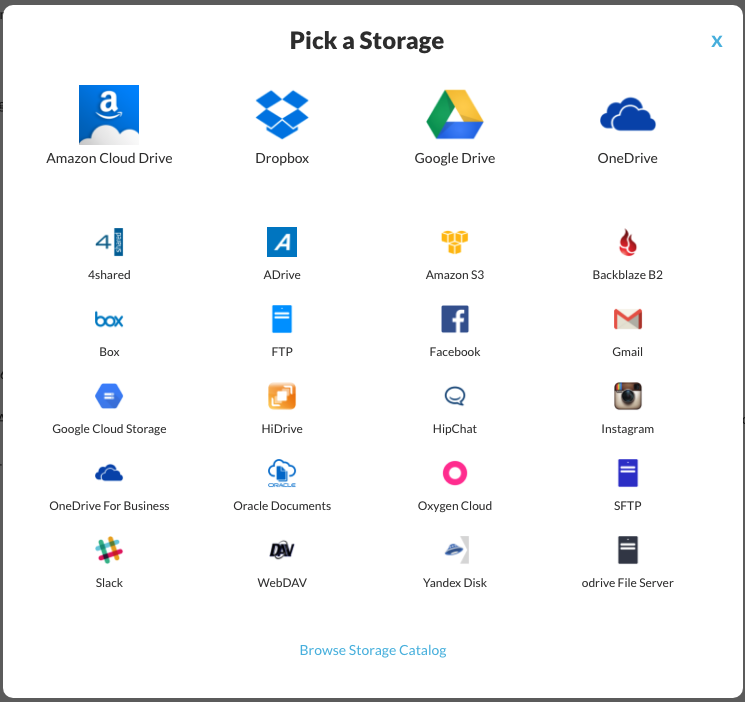
Select what you want to link and authorize the new storage. You will then see that newly added storage in "My odrive" and in your odrive desktop. It can take a few seconds to show-up on its own, buy you can perform a right-click->refresh to show it immediately.
UNLINK YOUR STORAGE
There may be cases where you need to unlink storage from your odrive account. You can also do this from the odrive webclient.
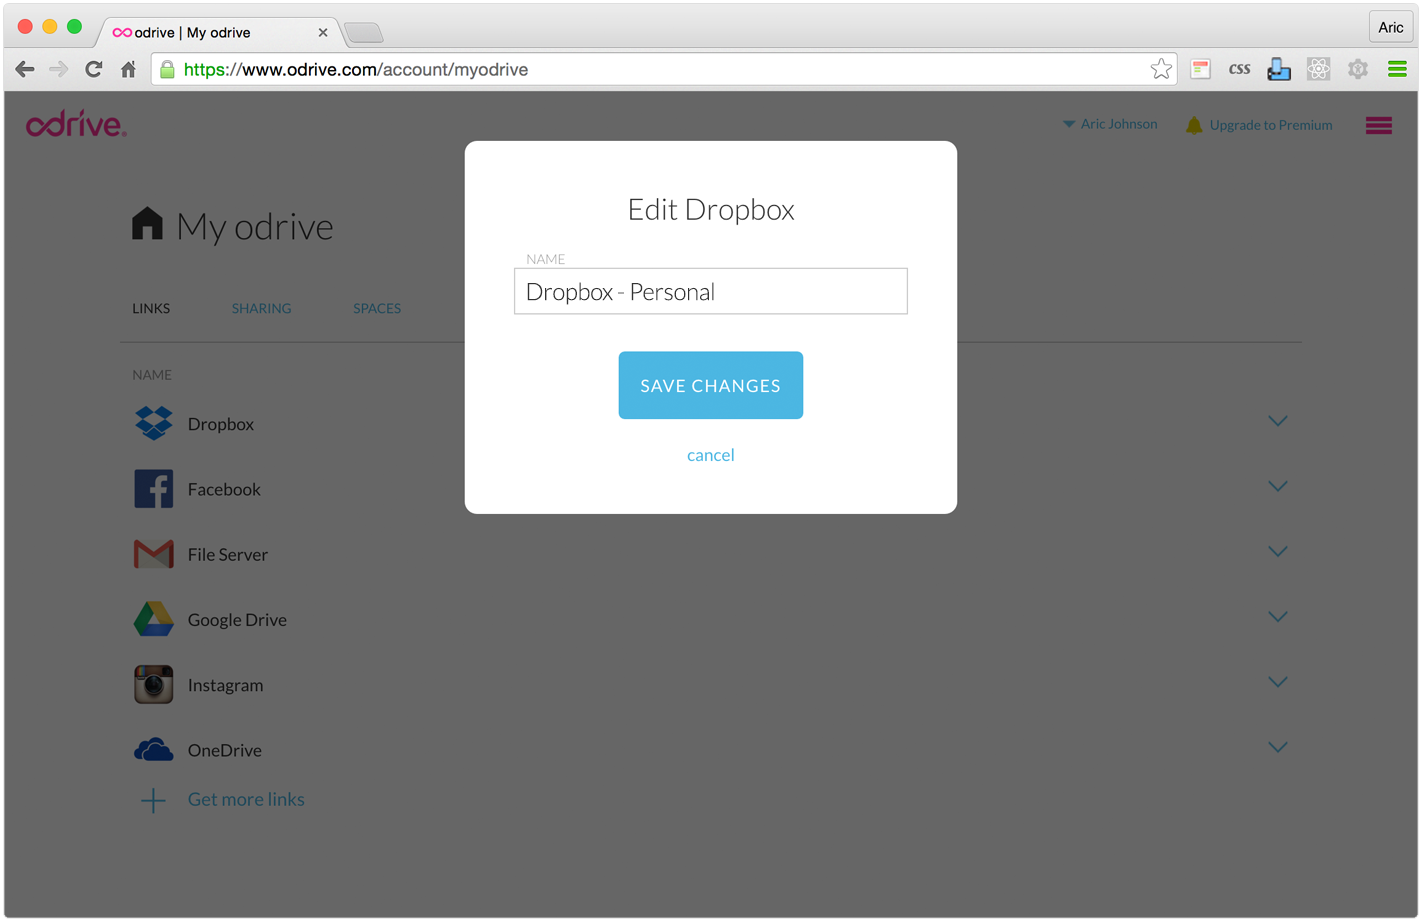
On the main "My odrive" page, where your storage links are listed, click on the 'V' icon to the right of the storage you wish to unlink and select "UNLINK".

When you unlink your storage account, the corresponding folder on the desktop client will be moved to the OS trash/recycle bin once odrive sees the change. You can trigger an immediate action for this by right-clicking the odrive root folder and selecting "Refresh".
Unlinking storage from odrive will not affect the cloud storage. All of your data in the applicable storage will remain as it is and available.
You can always link the storage again at a later time, using the instructions above.
Relinking storage to revert back to placeholder cloud files
If you don't need the fine-level granular control of using right-click to Unsync individual files and folders, you can always unlink the storage and then relink it. When you relink storage, everything resets to the initial state of having a top-level placeholder cloud file, taking up zero disk space.
Unsync and all other features are available during your 30-day free trial and with an active subscription. You can also unlink and relink storage to start over with all placeholder files.
LINK MULTIPLE ACCOUNTS FROM THE SAME SERVICE
odrive makes it easy to link multiple accounts from the same service (e.g. multiple Dropbox or Google accounts) so that they are always available from one place. You no longer need to log out of one account to access another account.
We have a short video that walks through linking all of your Google Drive accounts, or you can follow along below.
When trying to link a 2nd, 3rd, etc.. account for a service, you will need to make sure you are logged out of any accounts you already have linked, first.
-
Go to the service's own web client and make sure you are completely logged out.
- Dropbox: https://www.dropbox.com/logout
- Amazon Drive: https://www.amazon.com/clouddrive/signout
- Google: https://accounts.google.com/Logout
- Box: https://app.box.com/logout
- OneDrive: https://login.live.com/logout.srf
- Office365: https://login.microsoftonline.com/common/oauth2/logout
-
Go to https://www.odrive.com and link your desired account.
Keep selecting the same service link for every account of that service you have. You will then see every newly added storage in "My odrive".
You can then rename your links to avoid mixing them up on your desktop.
We do not limit how many storage accounts you link, even if they are from the same service.
MOVE ODRIVE FOLDER TO ANOTHER VOLUME
Upon installation, odrive is mapped to a default drive location, e.g. C:\Users\YOUR-WINDOWS-USER\ (Windows) or /Users/YOUR-MAC-USER/ (Mac), but you may want to move it to another location (e.g. D:\ or another internal drive) to target a larger storage volume.
From the odrive tray menu, select "Move odrive folder". Then when the folder picker dialog comes up, browse to the new location you want.

A new odrive folder will be created there. This will be your active odrive folder moving forward. All of the files and folders in this new odrive folder location will show up virtualized again (as placeholder cloud files) just like when you first installed odrive on this computer.
The old, original odrive folder will remain where it is in the prior location (this can serve to be a useful backup for any files that had previously been downloaded). Note that there may be placeholder cloud files and folders in this old location, but since they are disconnected from odrive, you will be unable to double-click on them to download and open them. Only the new odrive folder in the new location is active. Because of this, you may want to clean up this old odrive folder once you're sure you do not need any of the previously downloaded files inside so that you can avoid confusion later on.
Important Note:
Moving the odrive folder to an external volume (external drive, SD card, network mount) is an unsupported configuration. This type of setup can lead to unanticipated behavior or poor performance. While it will work, you should only do this at your own risk, with a proper understanding that potential issues that may arise.
ACCESS ODRIVE FROM THE WEB
Although you can access odrive from the web, it is missing the main benefits of sync that you get from the desktop. If you are actively working with files, we recommend that you use the desktop sync app, but using the web for access when you are remote is a useful alternative in a pinch.
From your desktop, you can open the odrive web client via the odrive tray menu by selecting "Manage links".
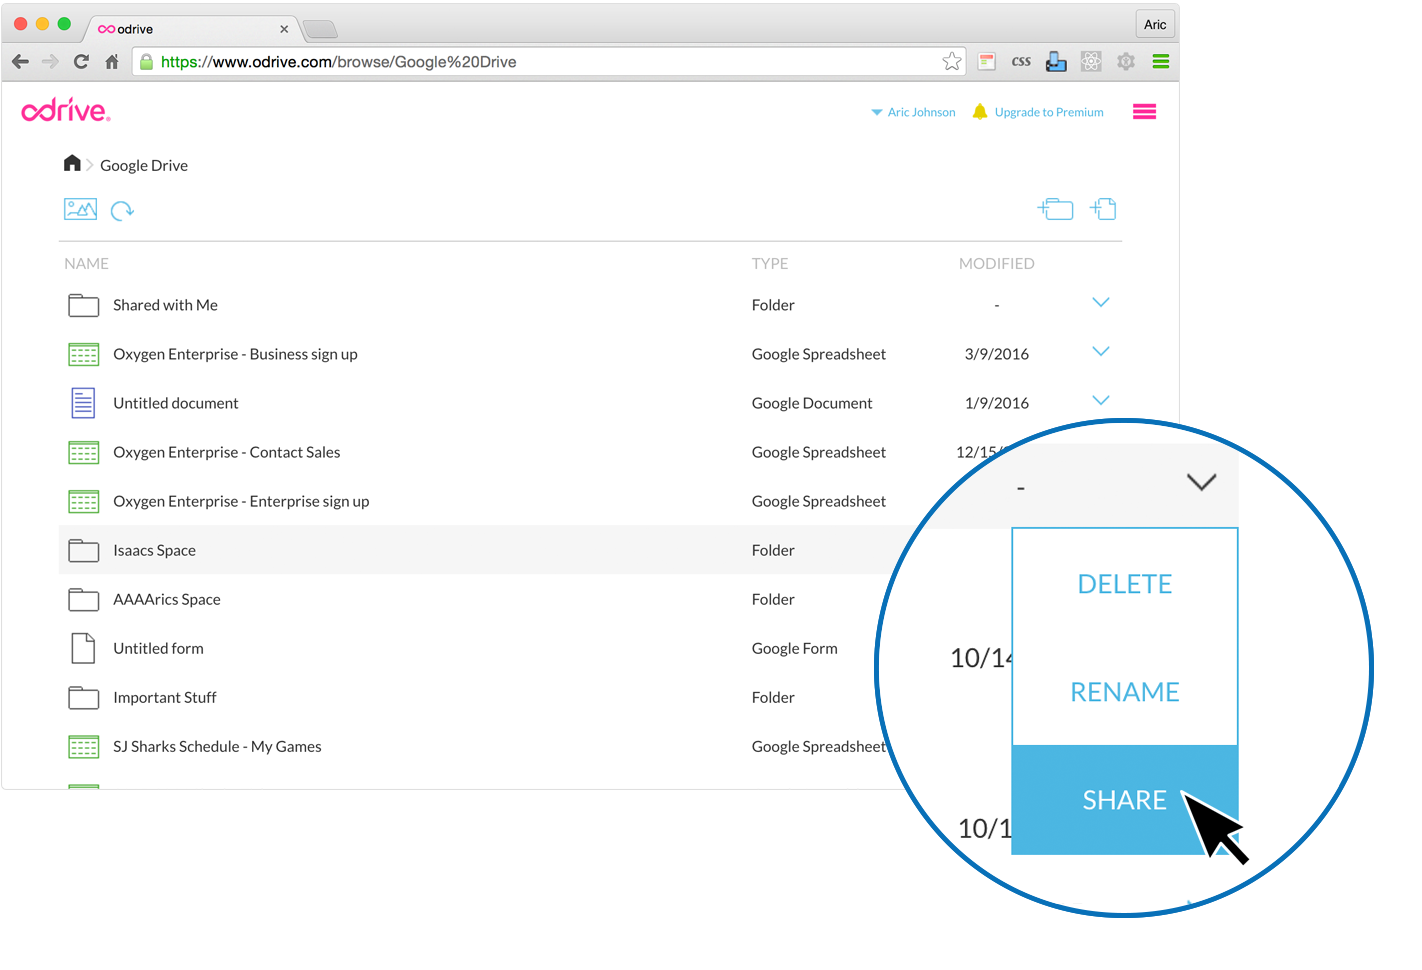
You are taken to your account main page. We refer to it as your "My odrive" page. It gives you a full view of all your odrive links and gives you access to your files.
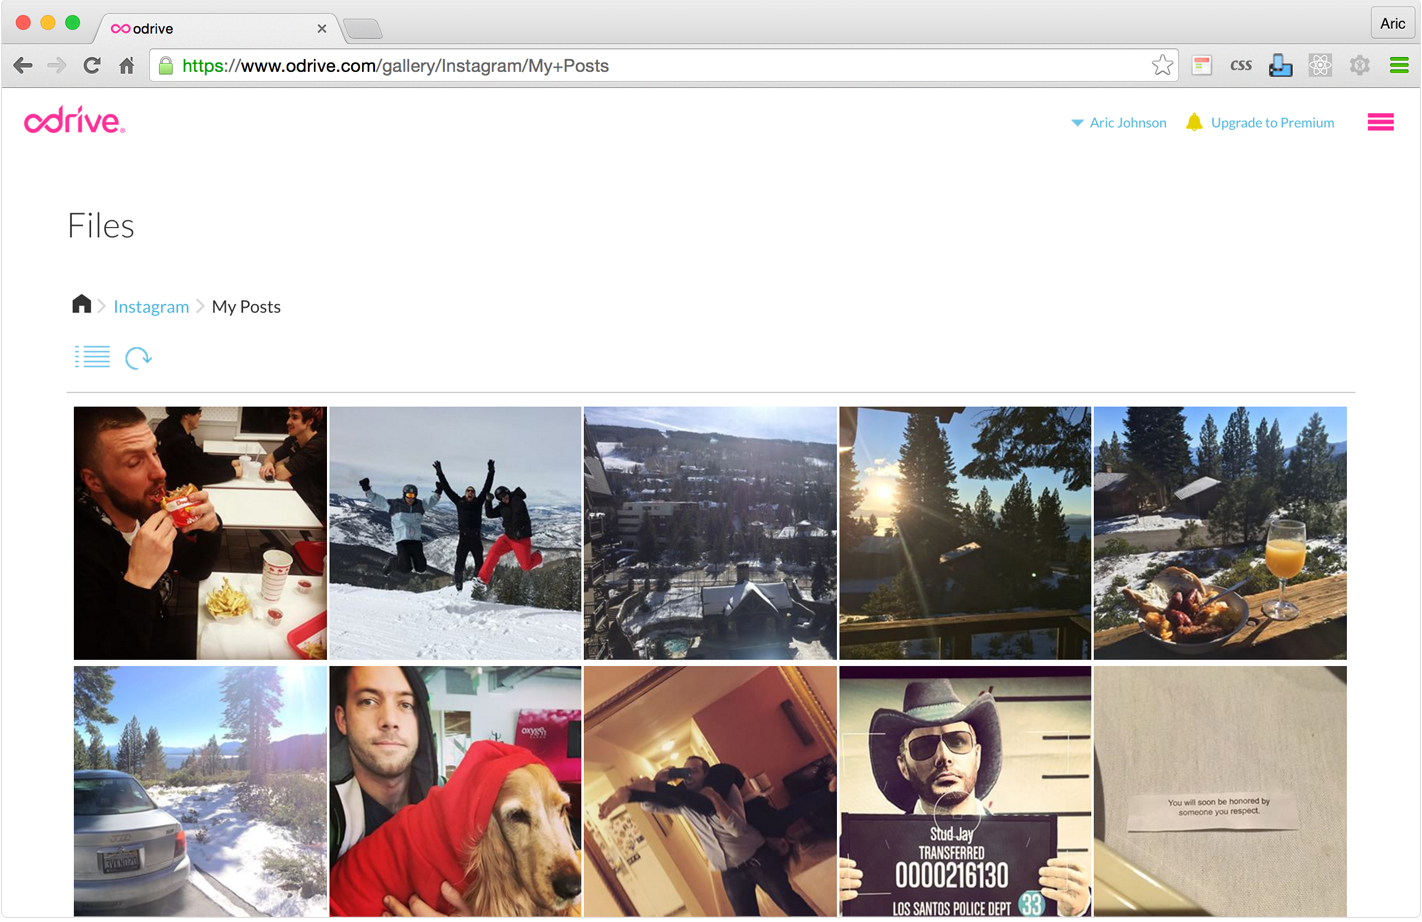
You can browse and view all your files in a thumbnail list or a full gallery view.
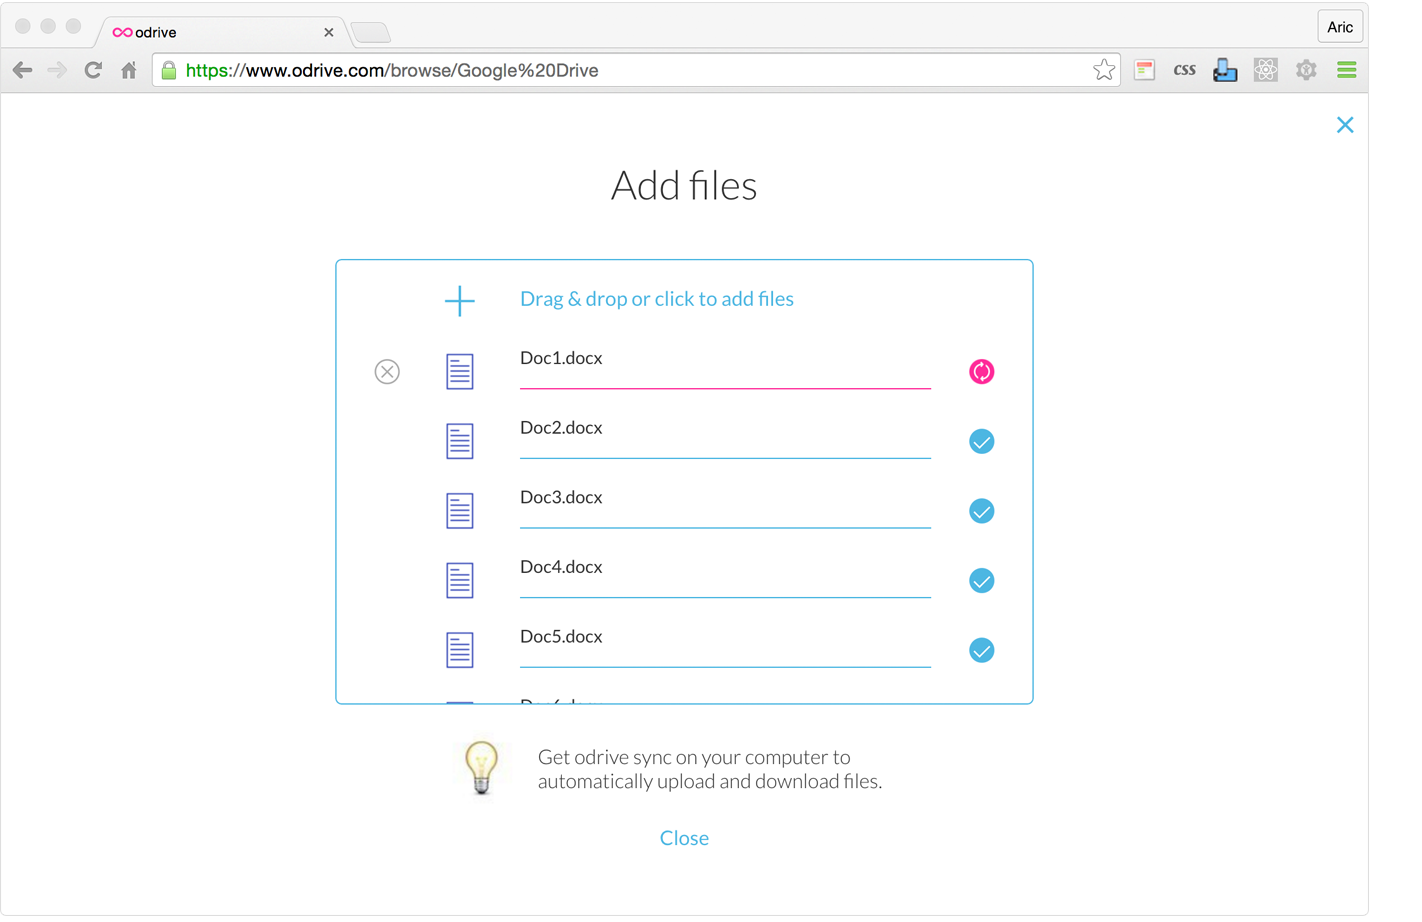
You can download and upload files.
You can share a link to any file or folder.
DEAUTHORIZE THE DESKTOP CLIENT
There may be times where you need to deauthorize the desktop client to login with different user, or to perform a reset of the local odrive folder and client cache in order to start fresh.
To perform a desktop client deauthorization, go to the odrive tray menu -> Authorized user -> Deauthorize.

This will create a backup of the current odrive folder and reset and reinitialize the cache. Once you login again you will have a fresh odrive folder with only placeholder files.
The backup folder that is created will be named "odrivebackup-[current date here]".
This procedure will not affect any of your cloud storage. It only affects the local desktop.