Sync Changes
ADD NEW FILES
To add new files or folders to odrive, just click and drag them into any odrive link folder or save a file directly to it. Under the hood, odrive will process the files/folders in a way to optimize a successful transfer to the cloud, especially if you sync a large set of files or large files on the desktop.
While it is updating, there is a pink badging icon that indicates that the sync is in progress.
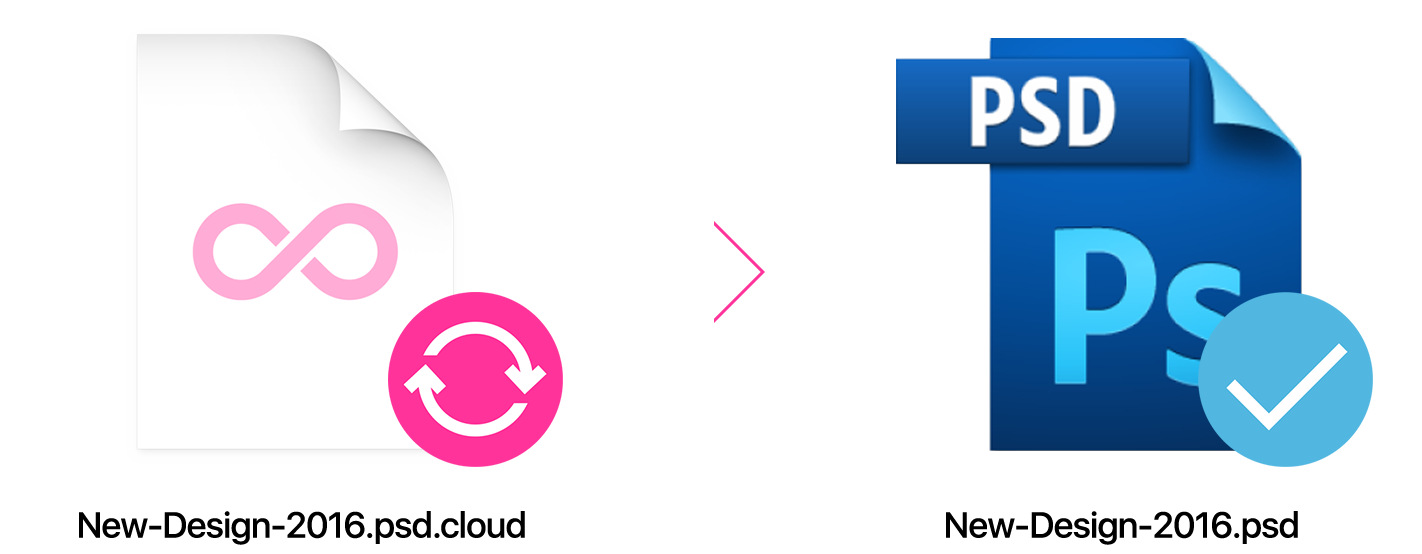 Badges indicate sync is in progress
When the files have a blue checkmark, you know that the sync with the cloud is complete.
You cannot save files to folders that are in their placeholder state. To move out of placeholder state, simply navigate into a folder or the subfolder within that folder that you wish to save your file to.
If you have very large sets of files that you'd like to sync with odrive but would prefer to leave those files in place on your computer (so you don't have to copy or move them to a location within the odrive folder), see how easy it is with the sync to odrive premium feature.
UPDATE FILES
Any changes that you save are automatically synchronized with the cloud. While it is updating, there is a pink badging icon that indicates that the sync is in progress.
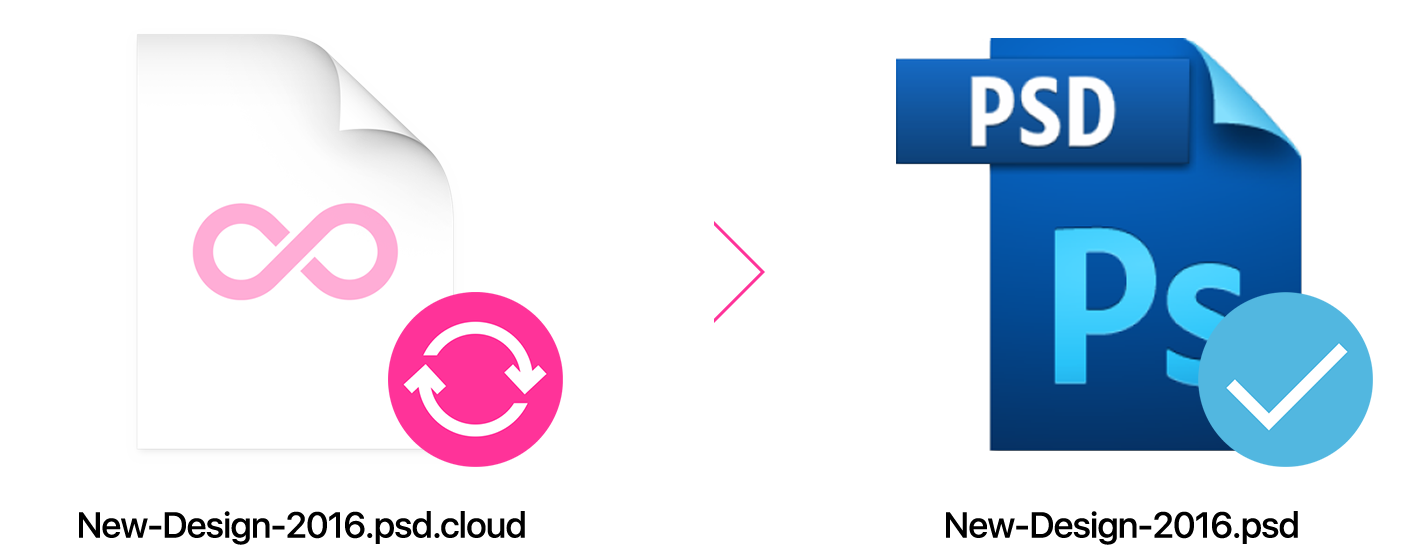 Badges indicate sync is in progress
When the files have a blue checkmark, you know that the sync with the cloud is complete.
DELETE EXISTING FILES
When it comes to deleting files on the desktop, we know that mistakes can happen. We err on the side of ensuring that a delete on the cloud side is the desired and intended effect.
When you delete files on your desktop, they sit safely in the odrive sync trash: Access your odrive Trash from your system tray
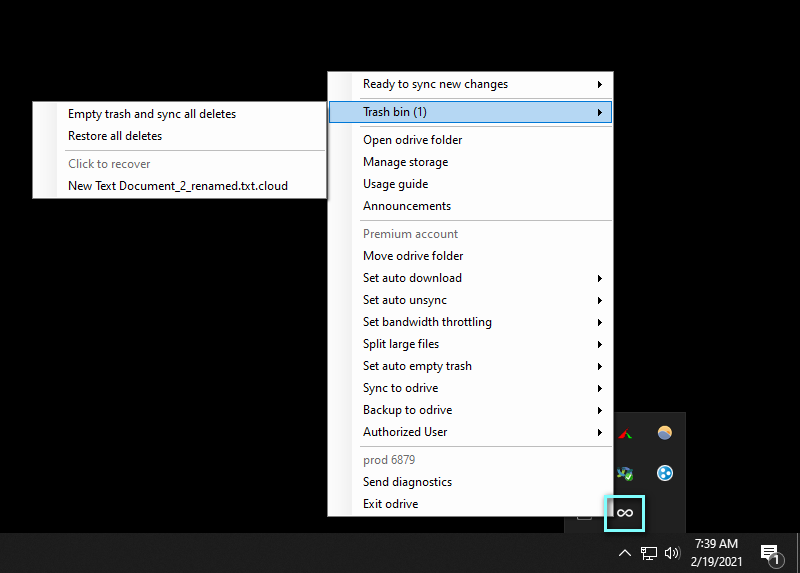
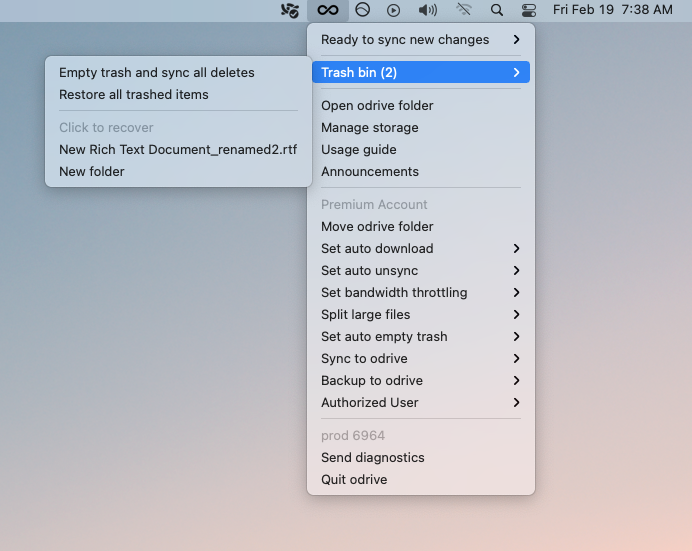
Until you empty the trash, the files are NOT deleted on the cloud.
Note that the inverse is NOT true. If a file is deleted on the cloud (e.g. you delete a Google Drive file from the Google web client or from the odrive web client), the delete will be processed on your computer running odrive as soon as it is detected. There is no odrive trash to empty.
RECOVER FILES FROM TRASH
When you delete files on the desktop, we hold the files to be deleted in the odrive sync trash. We do not sync the deletes with the cloud unless you affirmatively choose to do so.
To recover a single file or folder, click on it where it is listed in the "Trash bin" area of the odrive tray menu and select "Recover"
To bulk recover everything in the odrive trash, click on "Restore all deletes" (Win)/"Restore all trashed items" (Mac) in the "Trash bin" area of the odrive tray menu.
Once you recover a file or folder, we return the file to its original folder location.
EMPTY TRASH
When you delete files on the desktop, we hold the files to be deleted in the odrive sync trash. We do not sync the deletes with the cloud unless you affirmatively choose to do so. To fit your workflow, we give you 3 ways to sync the deletes.
To sync a single delete, click on it where it is listed in the "Trash bin" area of the odrive tray menu and select "Sync Delete"
You can bulk sync all of the deletes by selecting "Empty trash and sync all deletes" from the "Trash bin" area of the odrive tray menu.
Automatically emptying the trash
PREMIUM FEATURE
You can also set a policy to auto sync the delete.
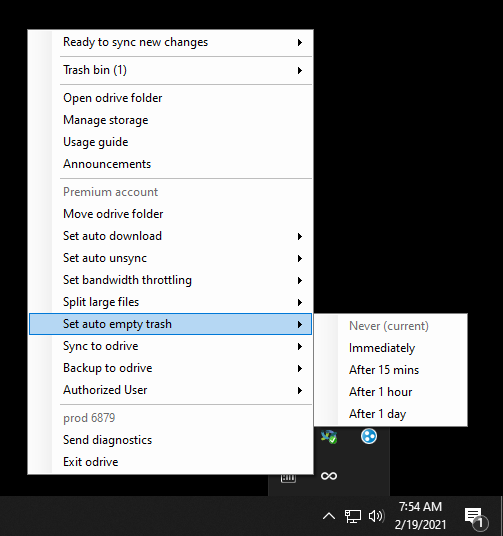
After a file is emptied from the sync trash, the file is permanently deleted from the cloud.
NOT ALLOWED LIST
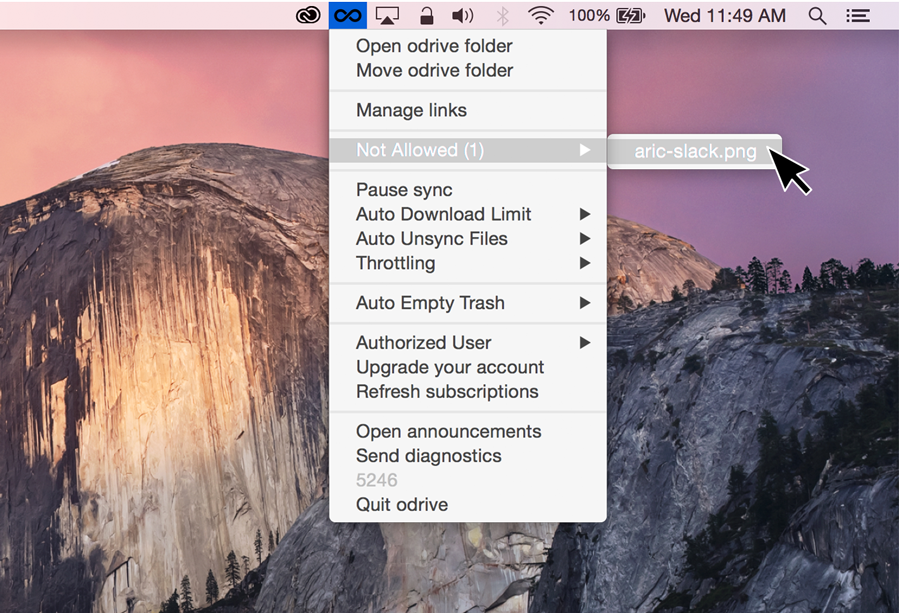
A file will appear in "Not allowed" if the source will not accept the new or updated file. Clicking on a file listed will present you with an explanation.
Some reasons file updates or new files are not allowed include but are not limited to:
- You are trying to upload to a read-only location (e.g. trying to upload to Facebook or Instagram)
- You are trying to upload a file to a folder that you do not have permission
- Illegal characters in the file name
- You do not have enough cloud storage space available to accommodate the change
To get a file off "Not allowed", you can update the file change or delete the new file.
IGNORE LIST
odrive will ignore certain files. They are typically system files and temporary files that are not intended to be synced to the cloud.
These types of files will show on your desktop client but will not sync to the cloud. They will not have any badging. There is no list that is generated with them on it. They are literally ignored.
This is the current "ignore" list.
File names
- .odrive
- .oxygenreserved
- .oxygenmeta
- odrive_user_general_conf.txt
- odrive_user_premium_conf.txt
- current_odrive_status.txt
- .lock
- .localized
- icon/r
- icon\r
- .dropbox
- .ds_store
- thumbs.db
- thumbs.db:encryptable
- desktop.ini
- com1
- com2
- com3
- com4
- com5
- com6
- com7
- com8
- com9
- lpt1
- lpt2
- lpt3
- lpt4
- lpt5
- lpt6
- lpt7
- lpt8
- lpt9
- con
- nul
- prn
- $mft
- $mftmirr
- $logfile
- $volume
- $attrdef
- $bitmap
- $boot
- $badclus
- $secure
- $upcase
- $extend
- $quota
- $objld
- $reparse
- System Volume Information
Extensions
- .tmp
- .download
- .crdownload
- .lrprev
- .dwl
- .dwl2
- .m/\~
Prefixes
- ._
- \~
- .\~
- .lock
- .dwl
- .dwl2
- .m/\~
CUSTOM IGNORE LIST/BLACKLIST
PREMIUM FEATURE FOR ADVANCED USERS
This feature provides a way for users to add their own patterns to the odrive global ignore list. Any items added will be treated just like the hardcoded items listed above
To access this feature, open and edit the odrive_user_premium_conf.txt file (located in the root of the default odrive folder) with a text editor. This is a standard JSON file.
Inside this file you will find the following sections:
blackListContains- Used to ignore all files which contain the phrase in its filename.blackListExtensions- Used to ignore all files with a specified extension.blackListNames- Used to ignore all files or folders with the specified name.blackListPrefixes- Used as a basic wildcard setting that will allow you to specify the beginning of the file or folder name to ignore.
The examples in each section can be replaced with custom settings, or you can add additional items to the end of the lists.
Warning
- Make sure you add commas to any lines added, except the last one in the section.
- All values are case-insensitive.
For example, if you want to ignore a folder named Ignore This Folder, replace the thumbs.db entry in the config file under blackListNames with ignore this folder.
Once you make the changes you want, save the file and then restart odrive for the settings to take effect.
WAITING LIST
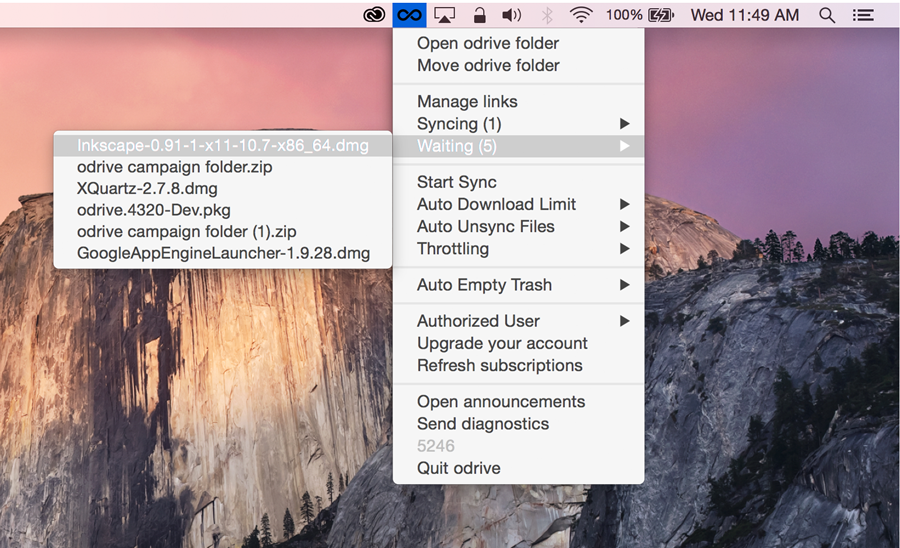
odrive sync will process files in a way that optimizes bandwidth and ensures successful transfer to the cloud, especially when you sync a large set of files or large files on the desktop. Along the way to the cloud, certain events may interrupt the completion of sync and odrive will place those files on the waiting list.
If you click on a file on the waiting list, you will be taken to the directory containing the file.
The interrupting events include, but aren't limited to:
- You are offline
- The server you are trying to access is down or busy
- You pause sync
- You stop sync
- Too many items trying to sync
Once the condition that is causing the files to be on the Waiting List ends, odrive will automatically resume sync and the files will come off the list as they are successfully synced.
FILE CONFLICTS
When multiple people are editing the same file, odrive resolves any potential conflicts by keeping both files and renaming the more recently submitted file as a conflict file. We err on the side of not losing data.
For example, when you are saving a local edit but odrive detects a remote change to that file, odrive will resolve the conflict by renaming the local file with "(conflict)".

FOLDER CONFLICTS
odrive resolves folder conflicts by merging folder contents.
For example, there is a "Folder A" in a remote source that is renamed "Folder B" (presumably, by someone other than you). At the same time, you upload a separate folder also named "Folder B" on your local desktop client. You will end up with a merged "Folder B" in both local and remote locations, consisting of the content from both the remote "Folder B" plus the content in the local "Folder B".
We are unable to interpret intent or preference so we err on the side of not losing data.
MOVE FILES ACROSS LINKS
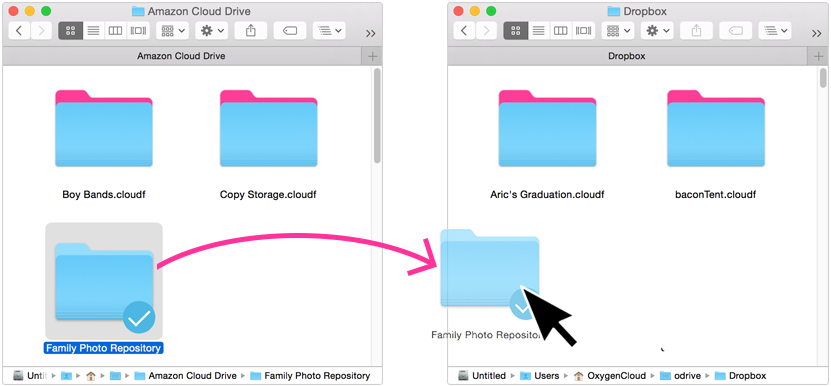
odrive makes a move of files between links easy since your linked sources are just presented as folders in odrive.
Assuming you want to move everything, the first thing you'll need to do is synchronize (i.e. download) all the files from the source to be moved.
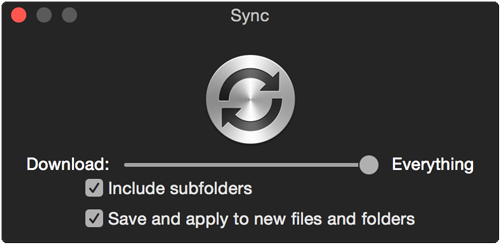
Be sure to click on "Include subfolders" and that the slider is set to download "Everything". To ensure that everything is downloaded, wait for the blue badge on all files and folders.
You can now simply copy over all the files and/or folders to the new link by dragging and dropping the folder.
Important Note
You cannot move placeholder files between linked sources currently (though in the future we may support this sort of automatic "cloud move"). For the meantime, we require you to make sure your file (or all files in the folder and all of its subfolders, if you are moving a folder) is no longer a placeholder file before moving it.
